Video: Croissants
One day my Italian friend Chiara asked me to teach her how to make croissants. I agreed right away, because I like sharing my passion with others! 🙂
Unfortunately, that was years ago and we never managed to meet and bake together… until now!
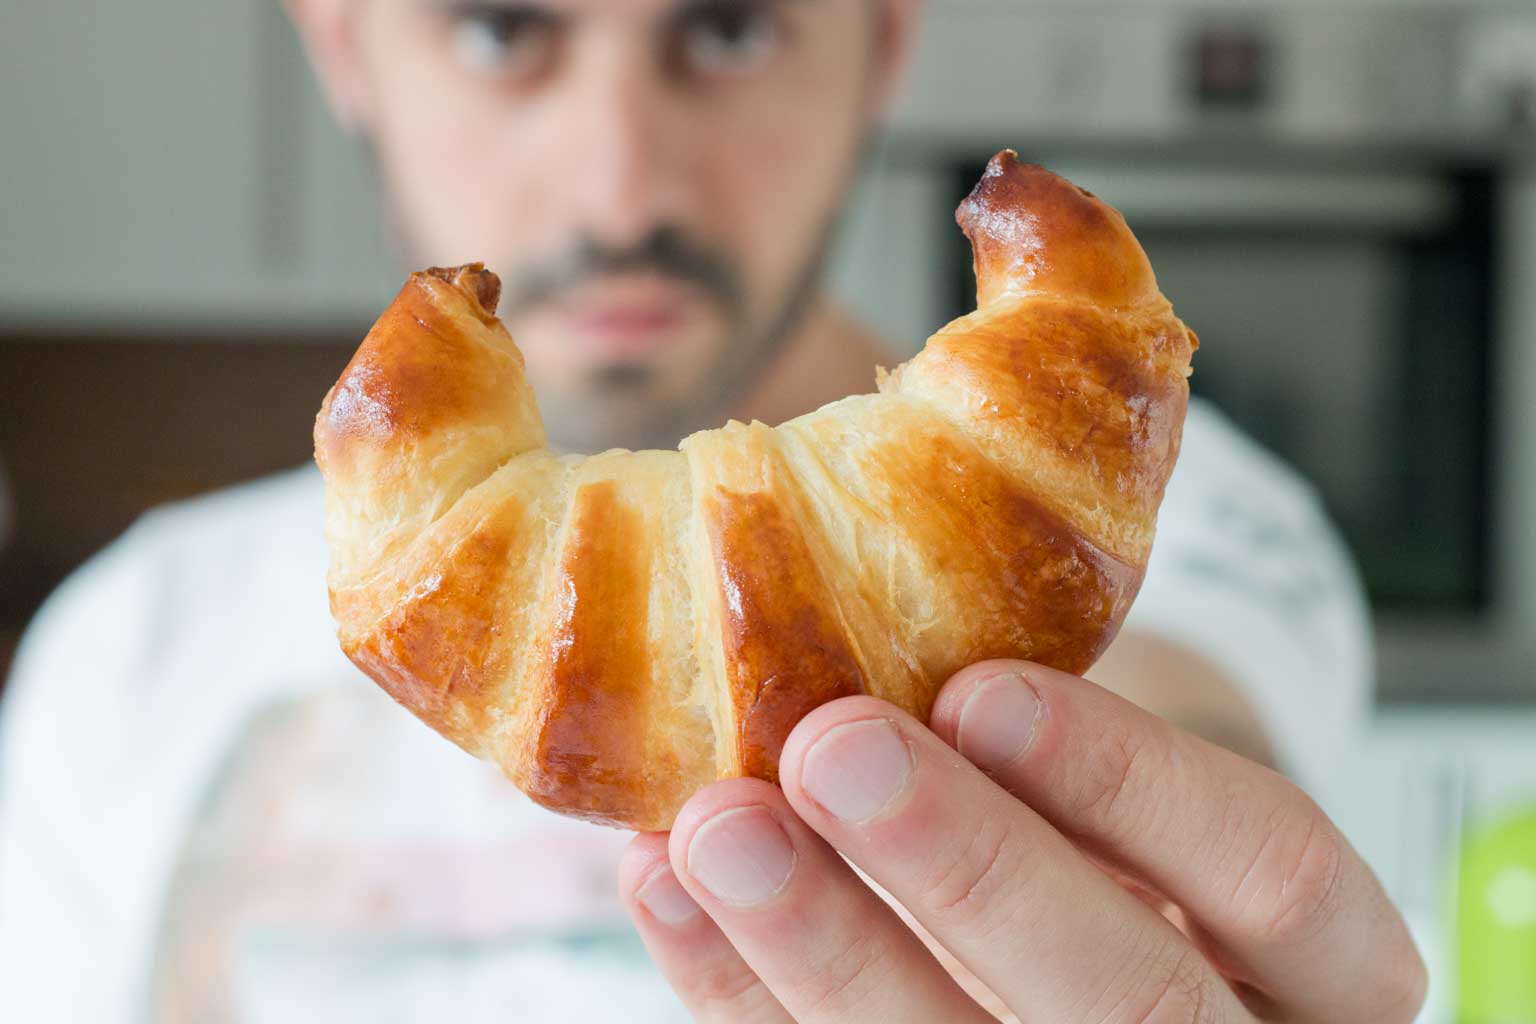
Watch how to make croissants (or check out the step-by-step recipe below) in my new video!
All the technical explanations are in my yeast and croissant dough articles, but if I had to recap the top 3 tips to obtain great croissants, they would be:
- Be patient. This dough has yeast AND is laminated. This imposes multiple rest times for the dough (rising, proofing, and after every fold). If you want to speed up the process, chances are you won’t get a decent result. So make sure you have at least 4 free hours (minimum total elapsed time, not real working time; storing the dough in the fridge gives you freedom on when to move on with the recipe)
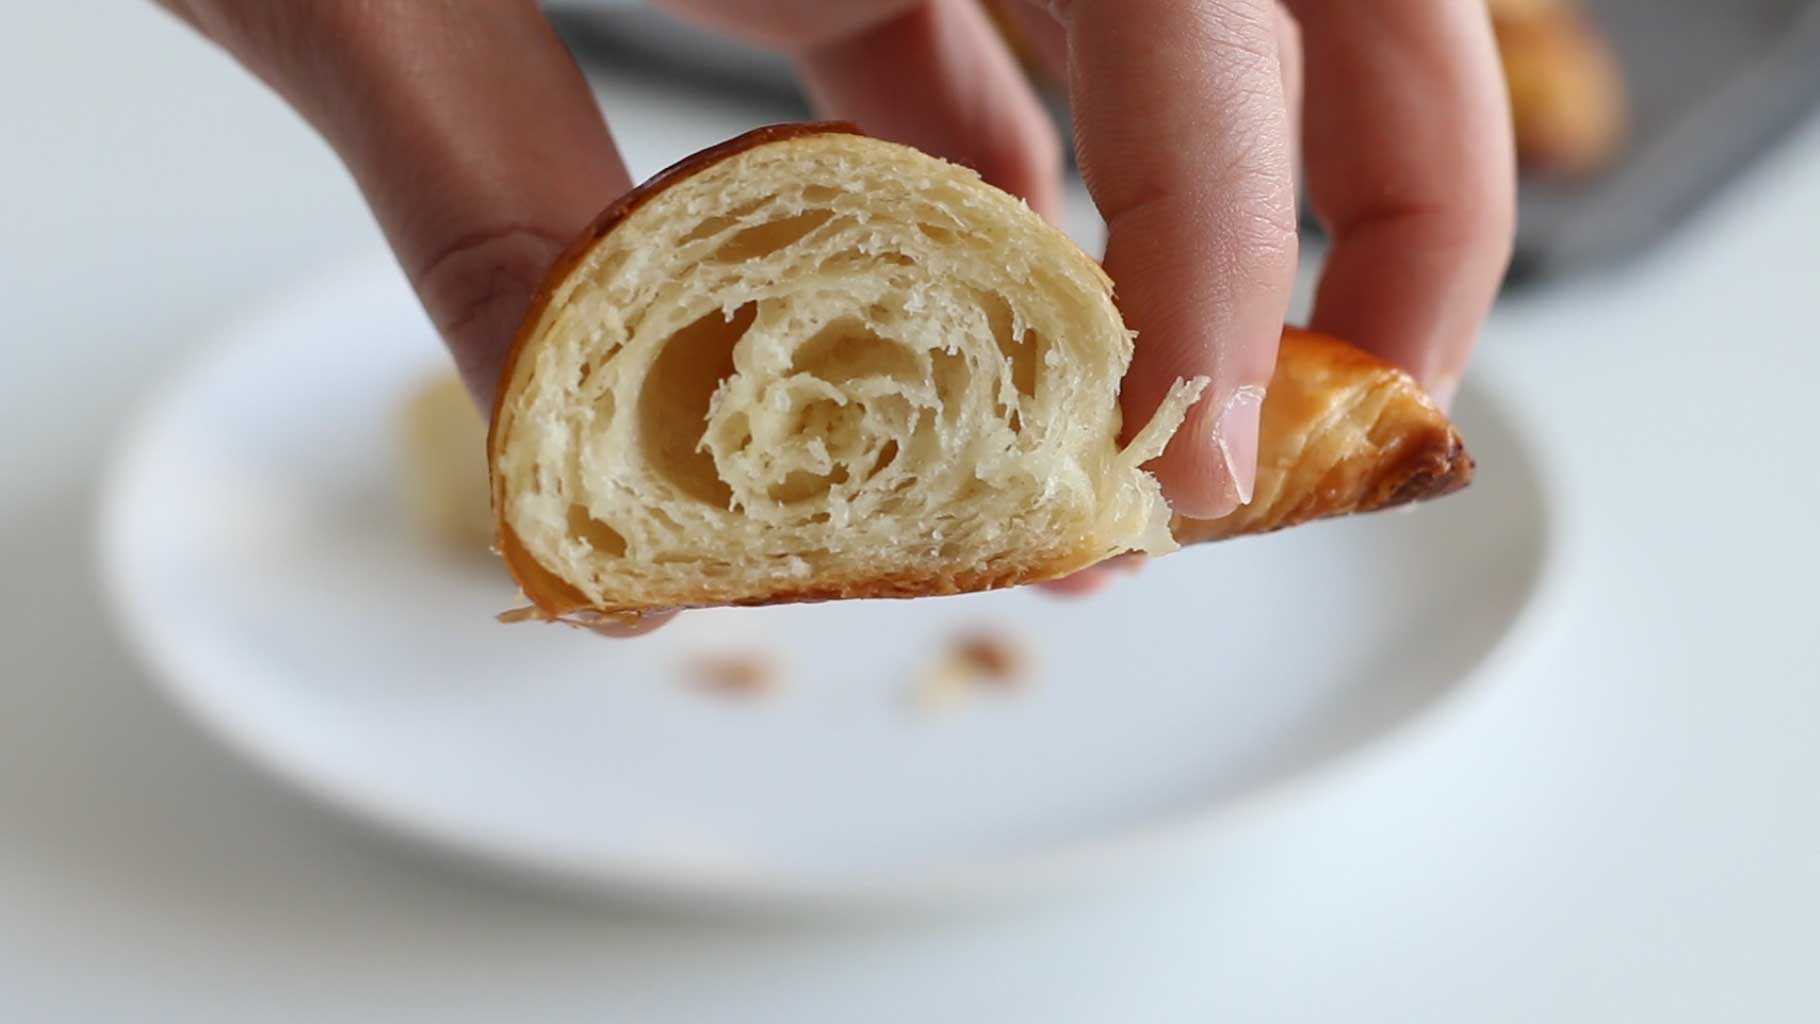
- Use a strong flour: given the important amount of butter in the recipe, we’ll need a flour with a W300+ (W is the indicator of flour strengths, the higher the stronger). This will help the dough develop strong gluten strands so that the layers of butter are well incorporated and the final result has a crunchy outside with many visible layers. If you can’t find a flour that highlights the W value, go for Manitoba flour. I don’t like products like “croissant mix” or “brioche mix” because they usually contain yeast (and many other unnecessary ingredients)… and that’s a bit like cheating! 😛
- The fridge is your friend: if you realize the dough (and the butter) are getting too warm and soft, just stop and refrigerate everything. Once the dough is colder, it will be much easier to roll it out correctly (always in one direction only during the folding phase) without the risk of the butter coming out from all sides.
Bonus tip: to get a good shape for the croissants… just practice! They won’t be perfect the first time… but just keep trying!
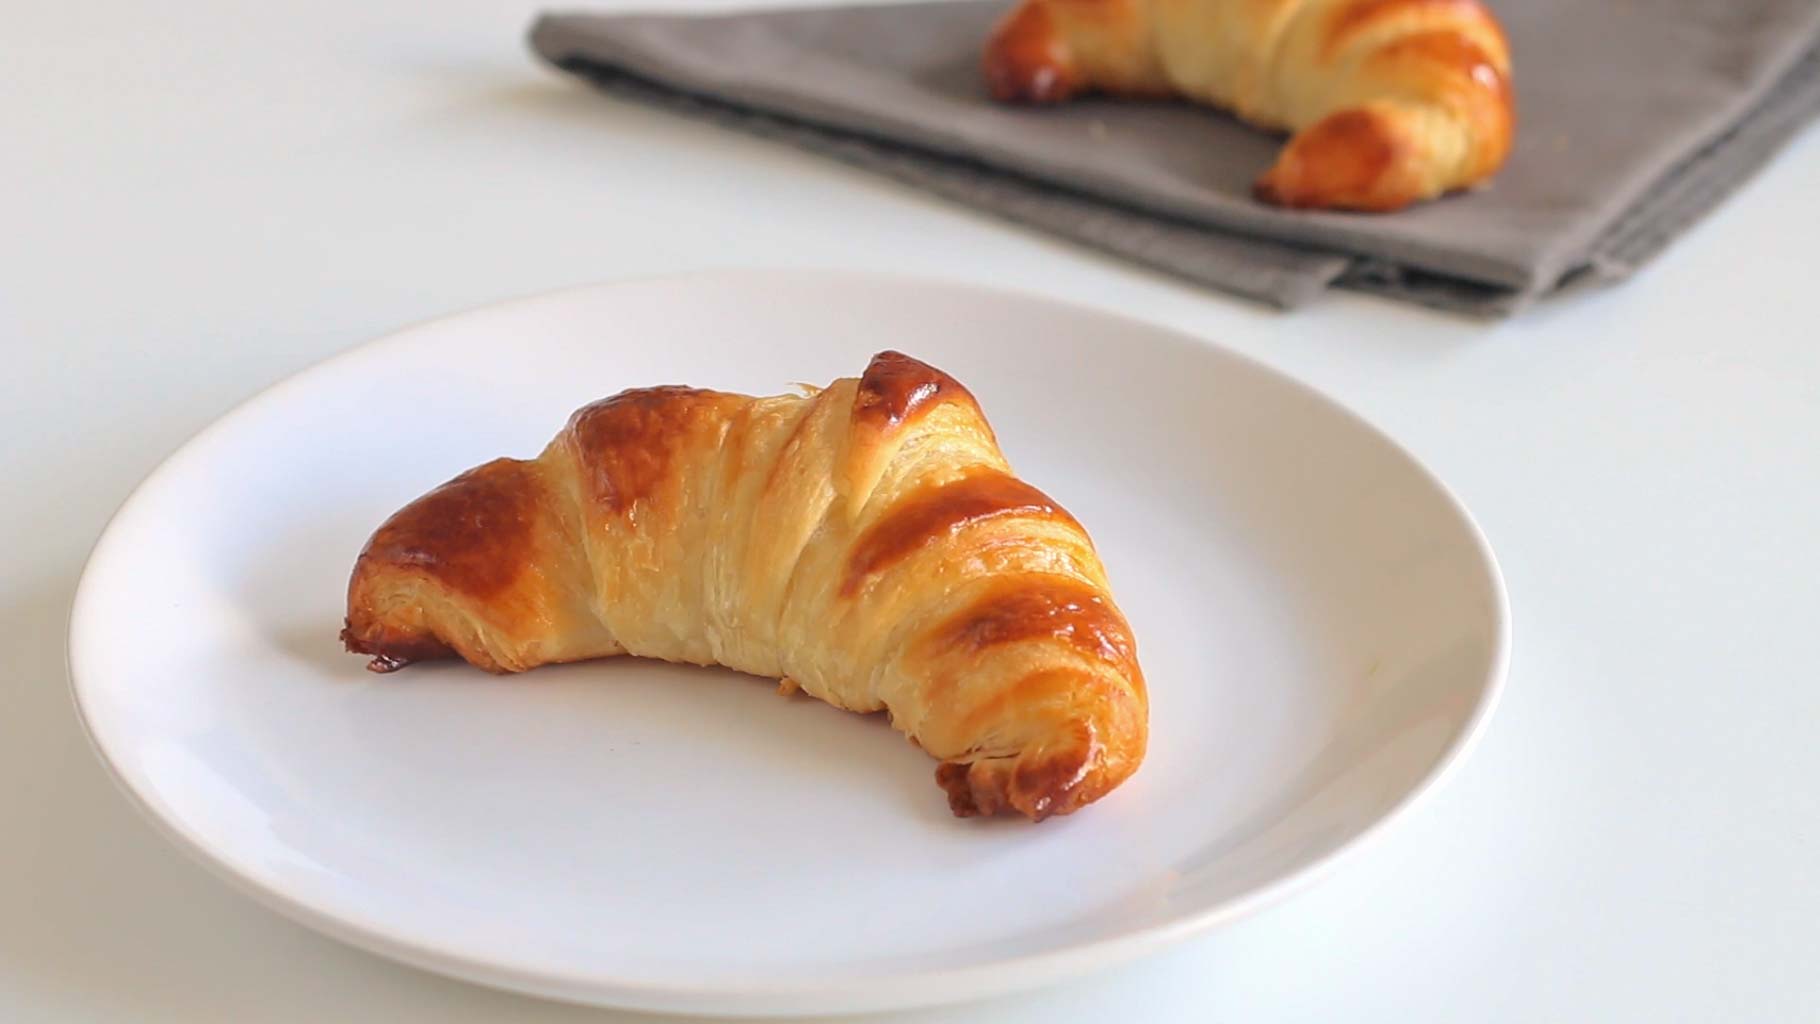
French croissants
 Print recipe
Ingredients
Croissant dough
| 250g | Pastry flour (W170) |
| 250g | Strong flour (W380) |
| 60g | Granulated sugar |
| 10g | Whole milk powder |
| 12g | Salt (~2 teaspoons) |
| 100g | Unsalted butter, cold |
| 25g | Fresh yeast |
| 230g | Cold water (at around 16C) |
Folding
| 250g | Unsalted butter |
Egg wash
| 1 | Egg |
| 1 | Egg yolk |
Directions
Croissant dough
1
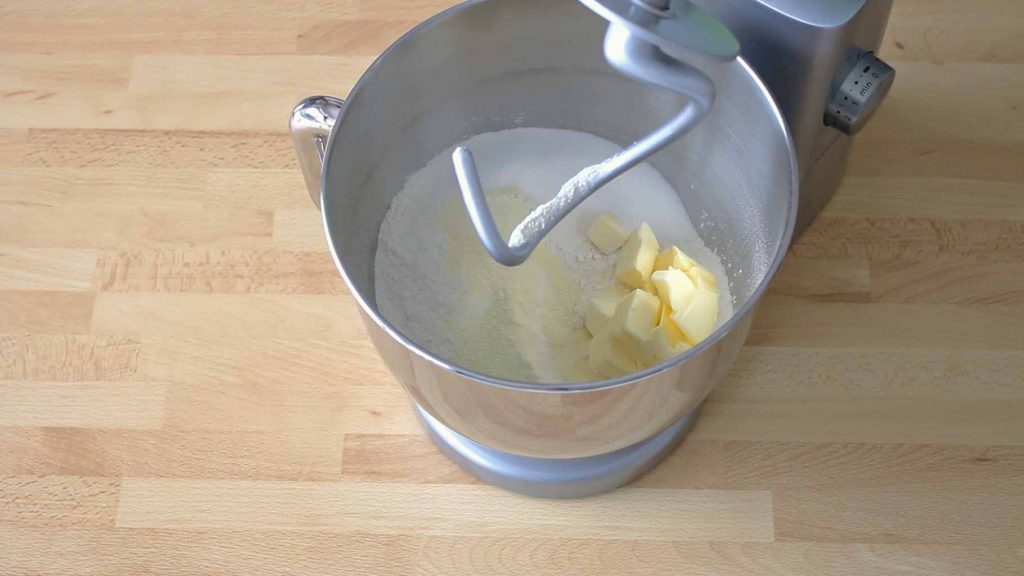
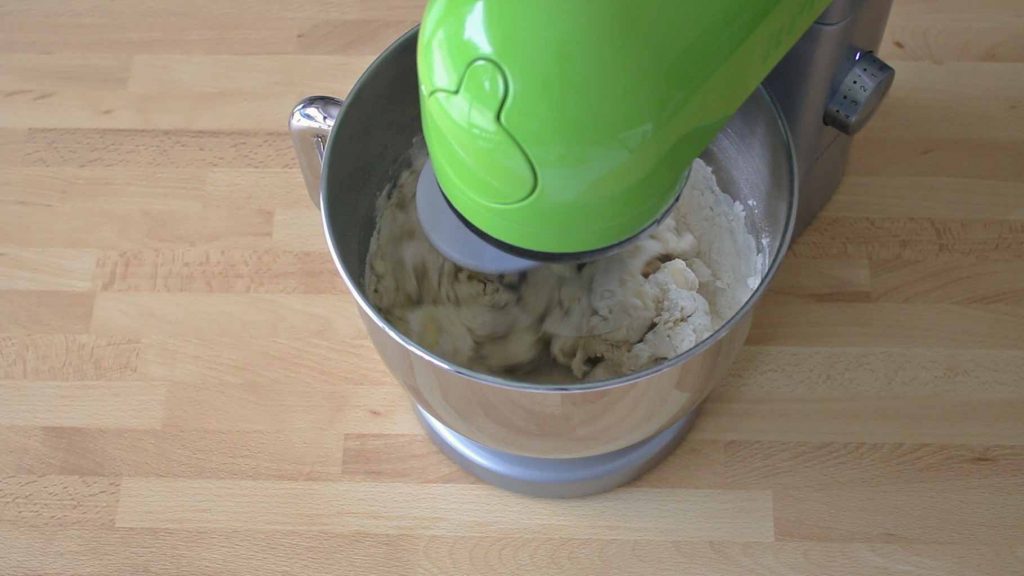
Place the yeast and the sifted flours in the bowl of a mixer. Next add the sugar, salt, milk powder and butter, each far away from the others
2
Add the water and mix at low speed with the hook attachment
3
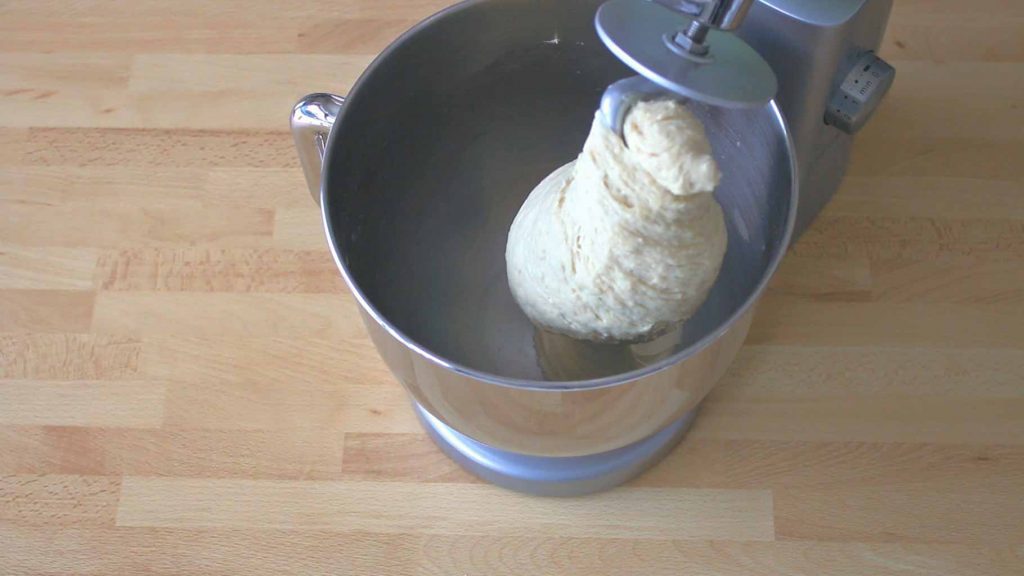
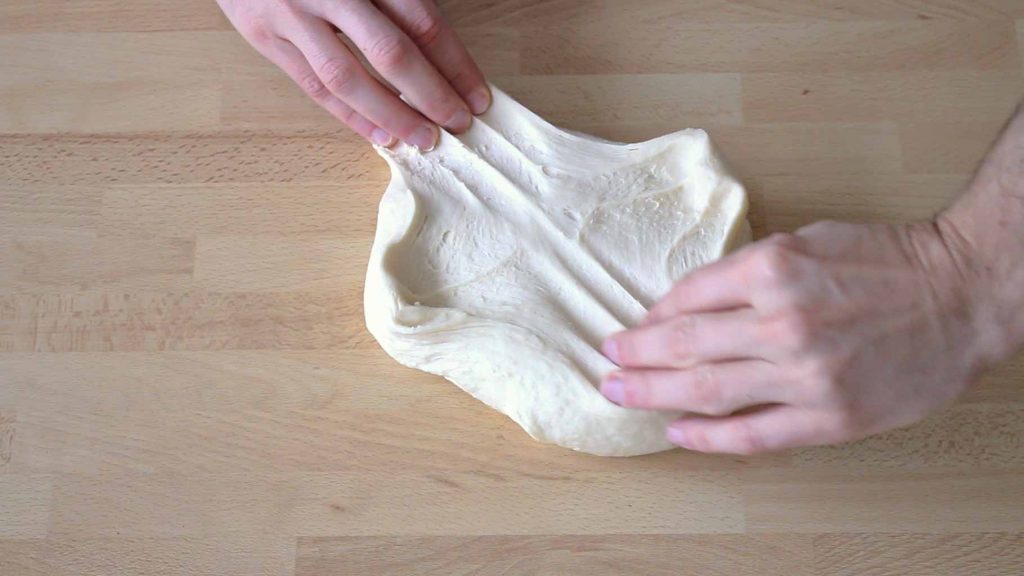
Stop mixing after around 6 minutes, when the dough sticks together and cleans the sides of the bowl (don't overknead otherwise it will be hard to roll it out, so do not worry too much if the dough is not perfectly smooth)
4
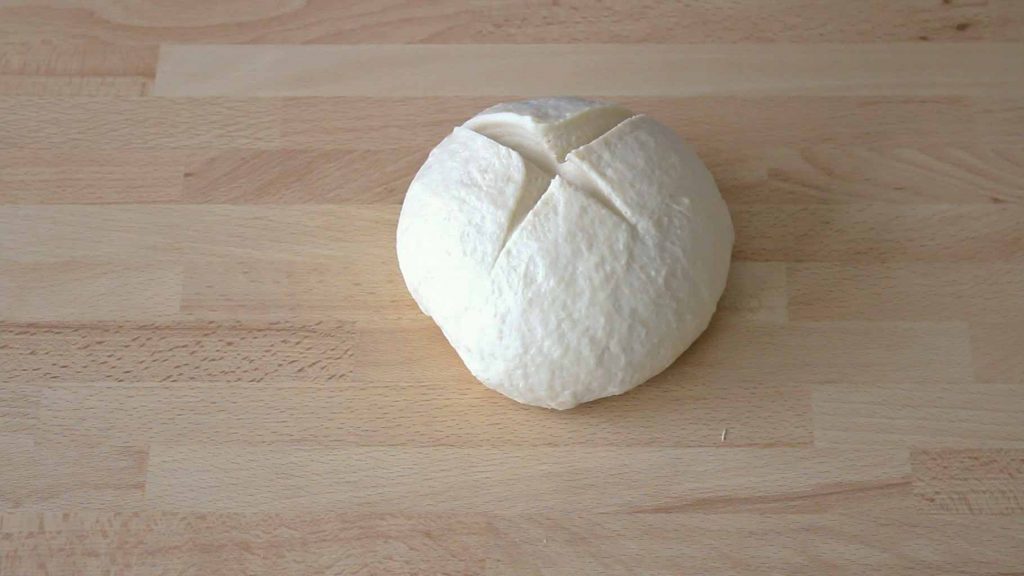
Make a ball with the dough and perform a cross cut on the top
5
Cover and let it rise for 1 hour
6
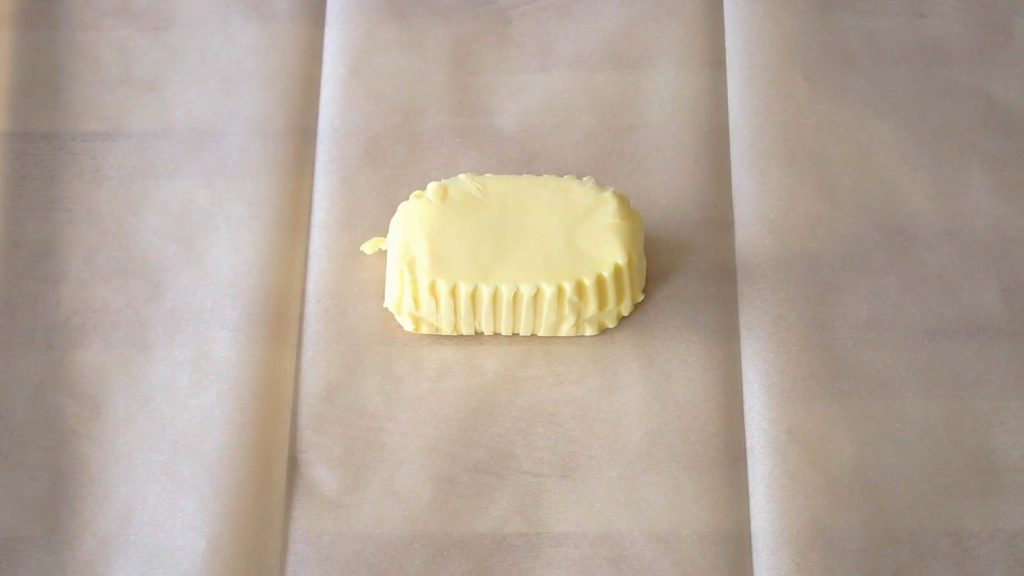
Place the folding butter at the centre of a large sheet of parchment paper

7
Fold one side the parchment paper over the butter, then unleash your violence and smash the butter with a rolling pin...
8
...until you obtain a nice and flat 7mm-high rectangle (you can easily shape it by folding the paper as soon as the butter starts "expanding" too much)
9
Pull out the corners of the cross you cut on top of the ball of dough and shape the dough roughly like a square
Croissant dough
10
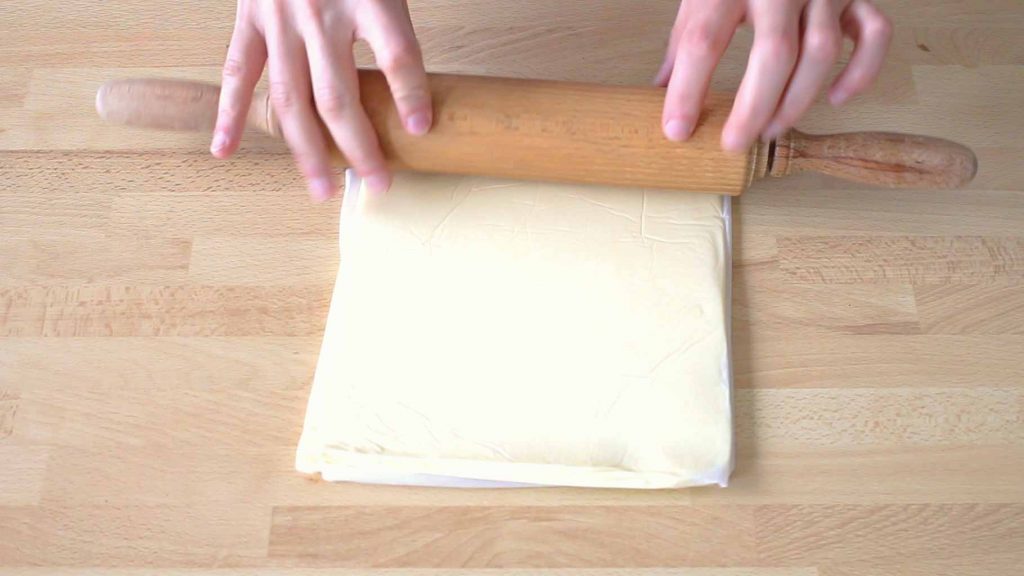
Roll out the cold dough vertically to 7mm high on a lightly floured work surface (try to keep straight edges). Do not roll it sideways nor rotate it, just roll it out in one direction only in front of you.
11
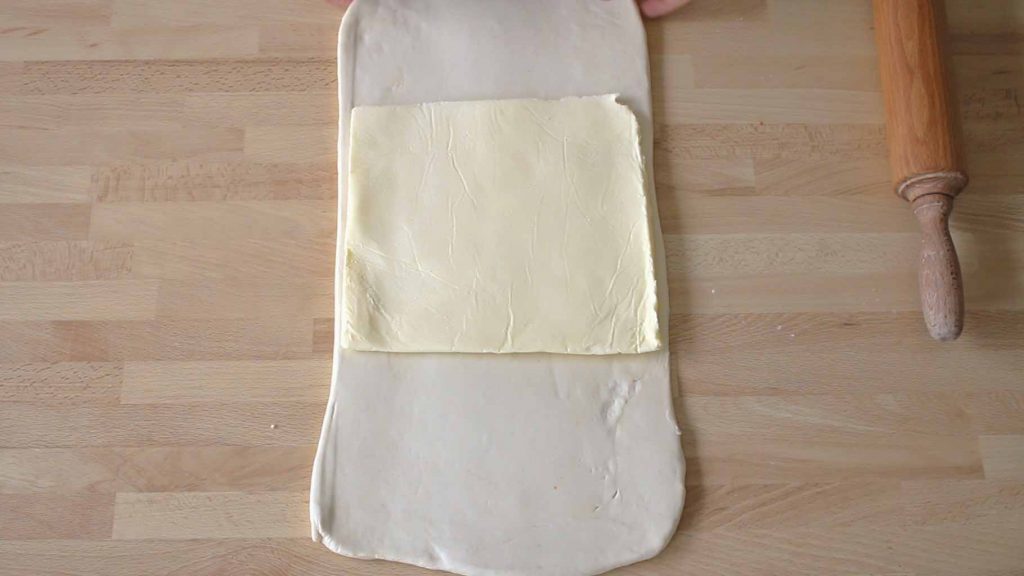
Place the flattened butter in the middle of the rolled out dough (the butter and the dough should have a similar consistency; consider re-chilling the butter before using it)
12
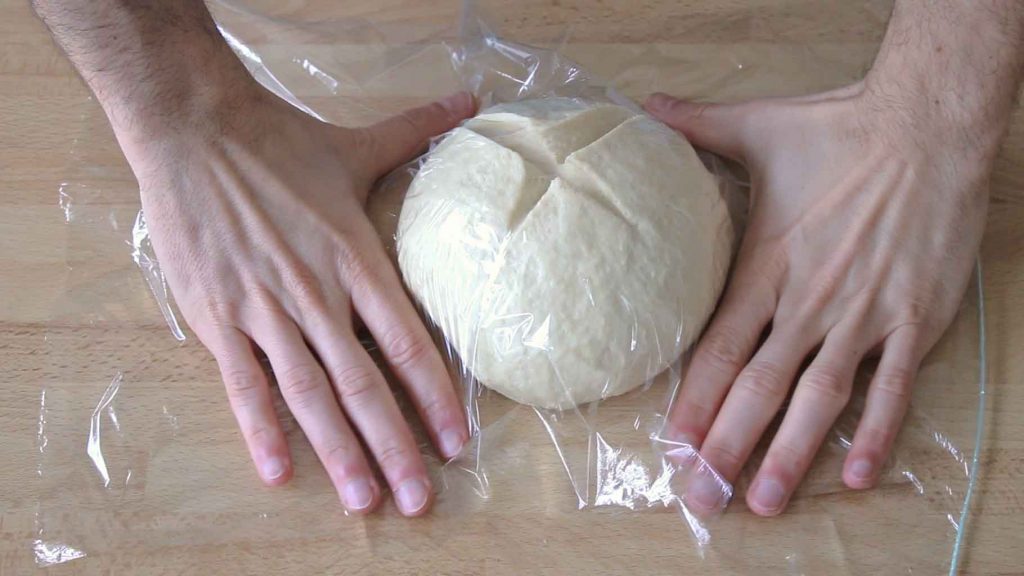
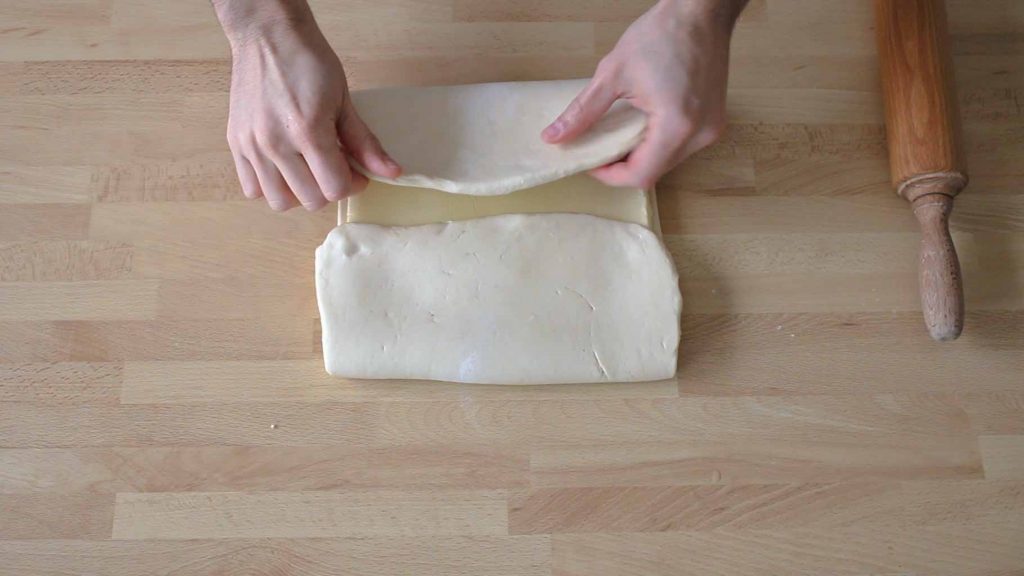
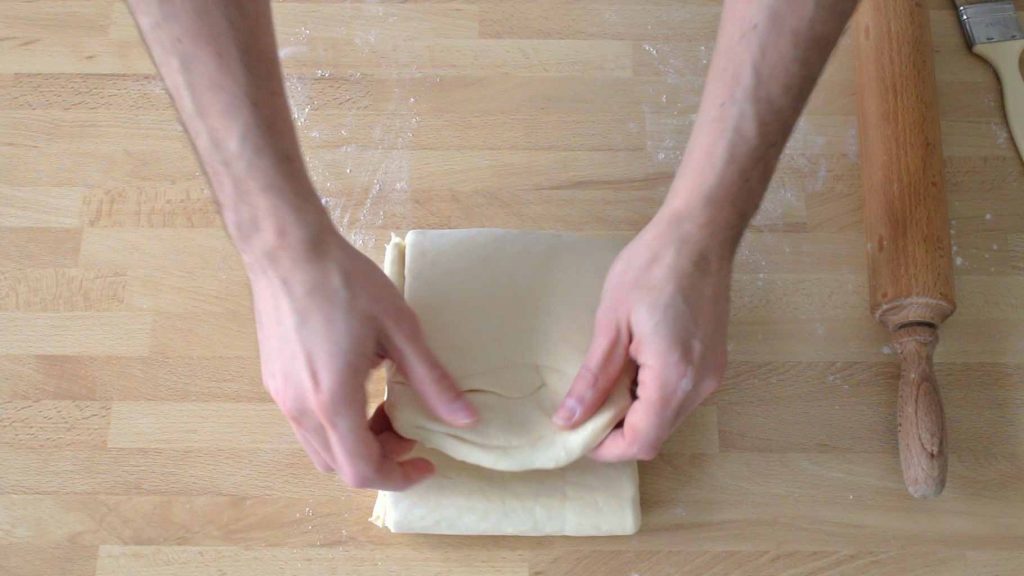
Fold the remaining parts of the dough over the butter. Press the edges with your fingers to make sure that the dough fully contains the butter. Wrap the dough in plastic and refrigerate for at least 1 hour.
13
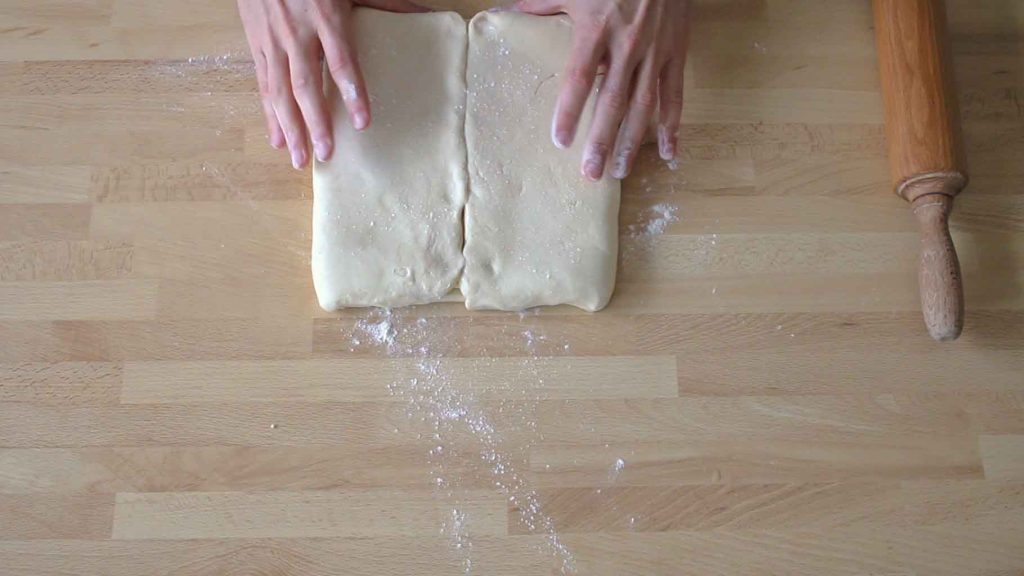
After chilling, place the dough on the lightly floured work surface so that the joint between the two edges is perpendicular to you.

14
Quickly roll out the dough vertically, only in one direction like before. If the dough is too cold, start pressing the rolling pin horizontally in different spots, including the top and bottom edges. In general, try to be gentle in order to flatten the dough without damaging the layer of butter
Once the dough has started to become longer vertically, finish rolling it out vertically with wider movements to 6mm high (remember to always work in the same direction: back and forth, not sideways).
Once the dough has started to become longer vertically, finish rolling it out vertically with wider movements to 6mm high (remember to always work in the same direction: back and forth, not sideways).
15
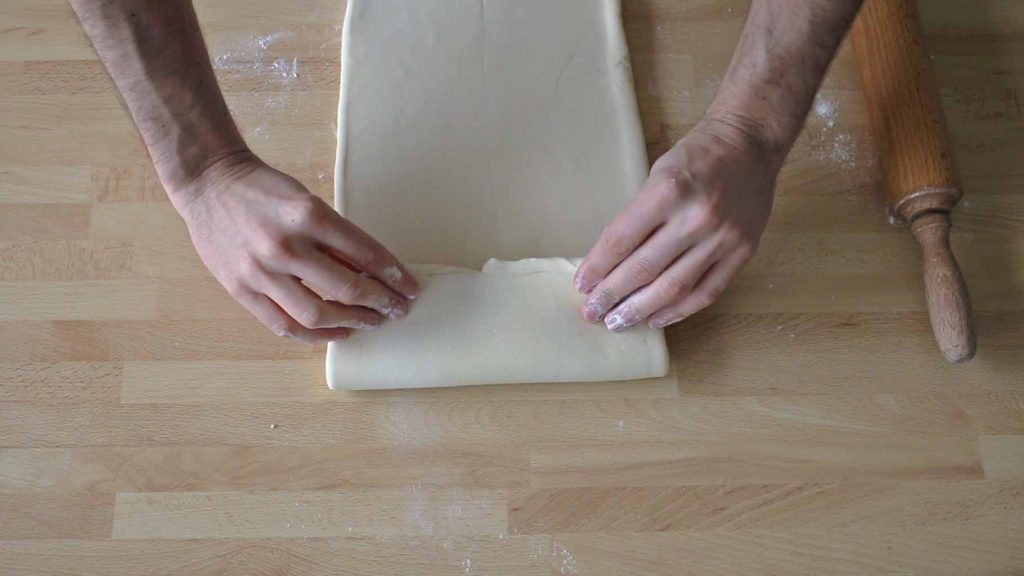
Fold the top part down so that it reaches 1/4 of the length...
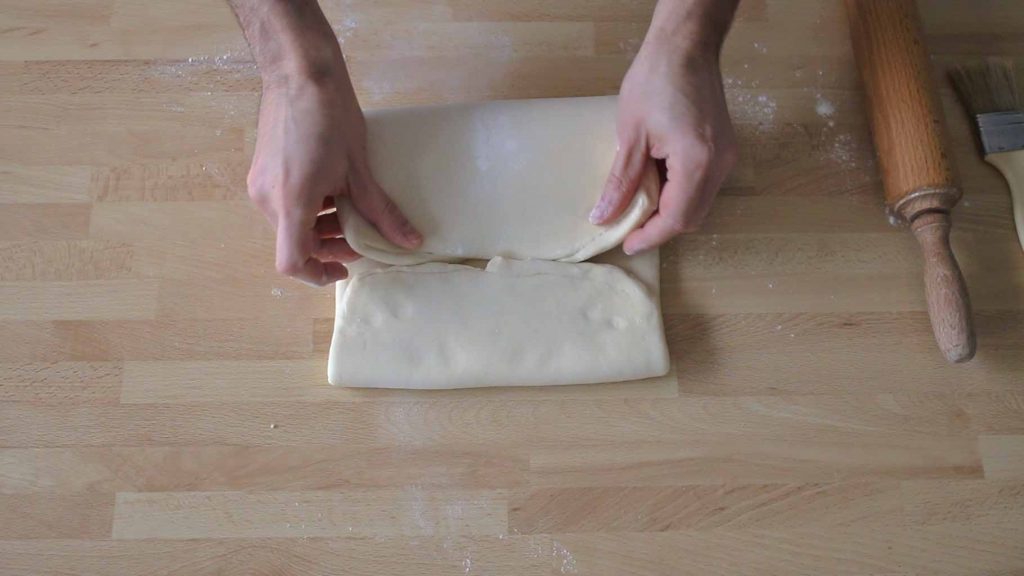
16
...then fold the bottom part up to match the other edge folded in the previous step (always remember to brush off the excess flour).
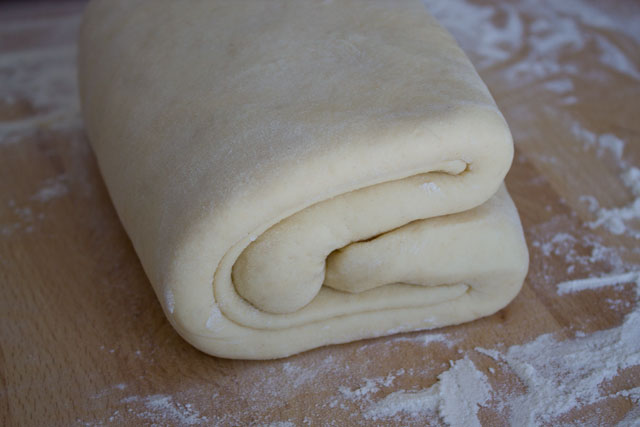
17
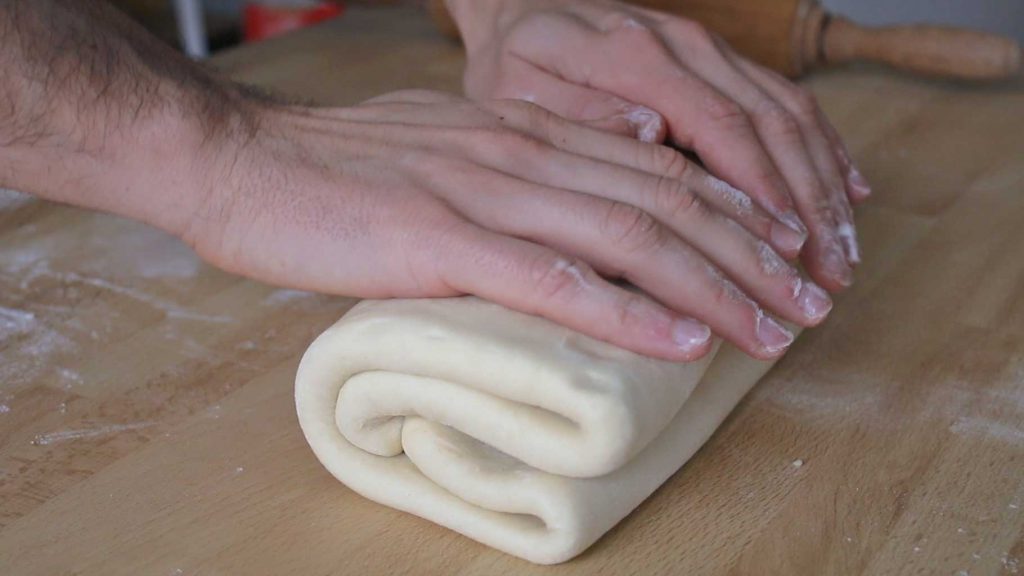
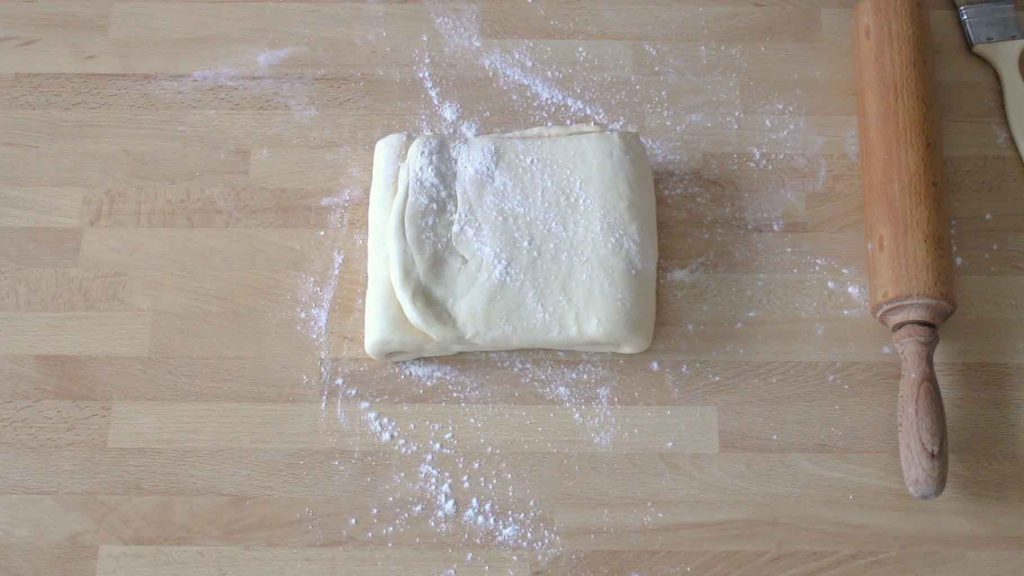
Finally, fold the bottom part again in two so that you end up with 4 layers of dough. Now you can wrap this in plastic and refrigerate for at least one hour.
18
After that, turn the dough 90° clockwise compared to how you folded it before, so that the edge is on your right)
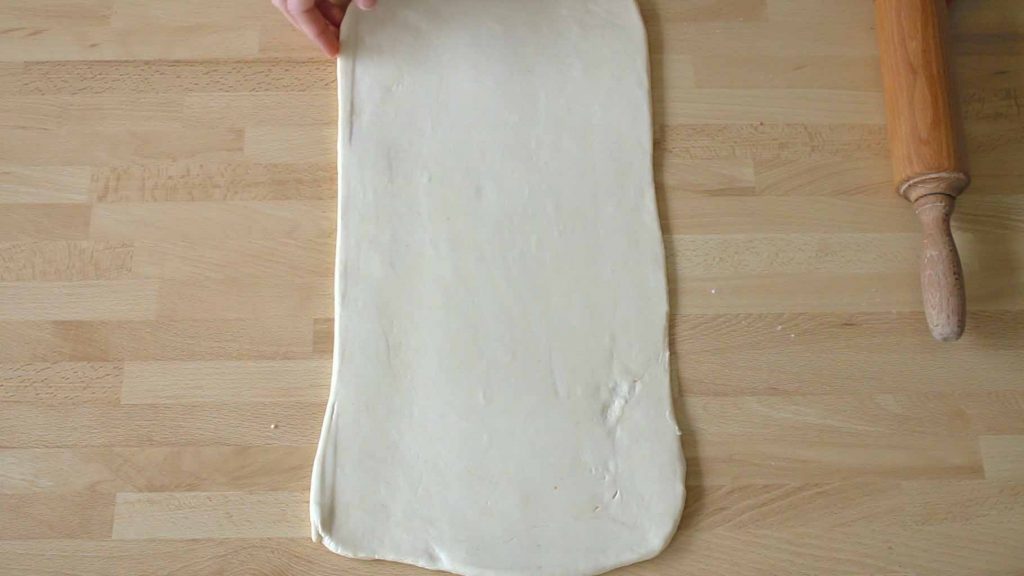
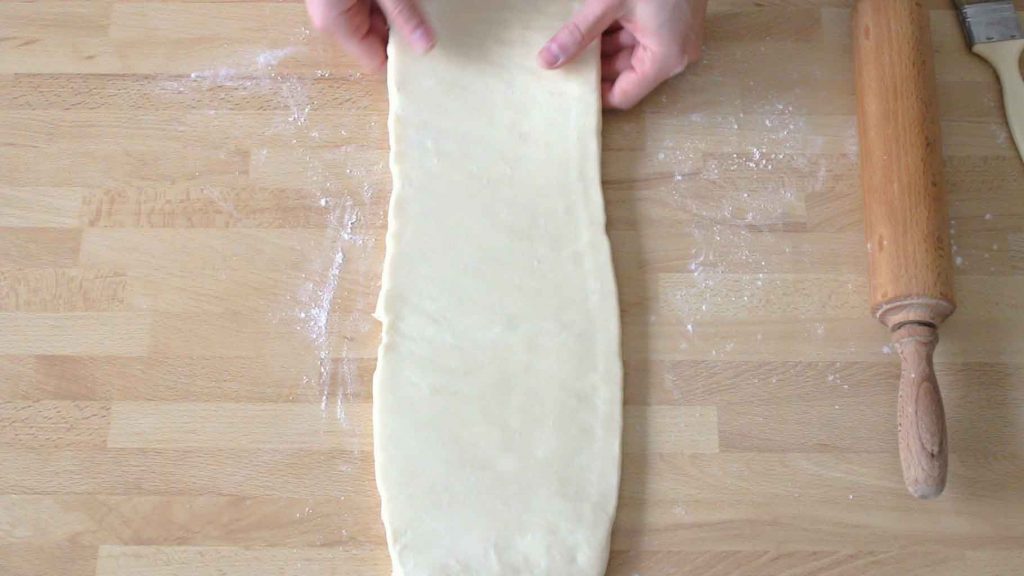
Roll the dough out again until it is three times longer, exactly like before.
Roll the dough out again until it is three times longer, exactly like before.
19
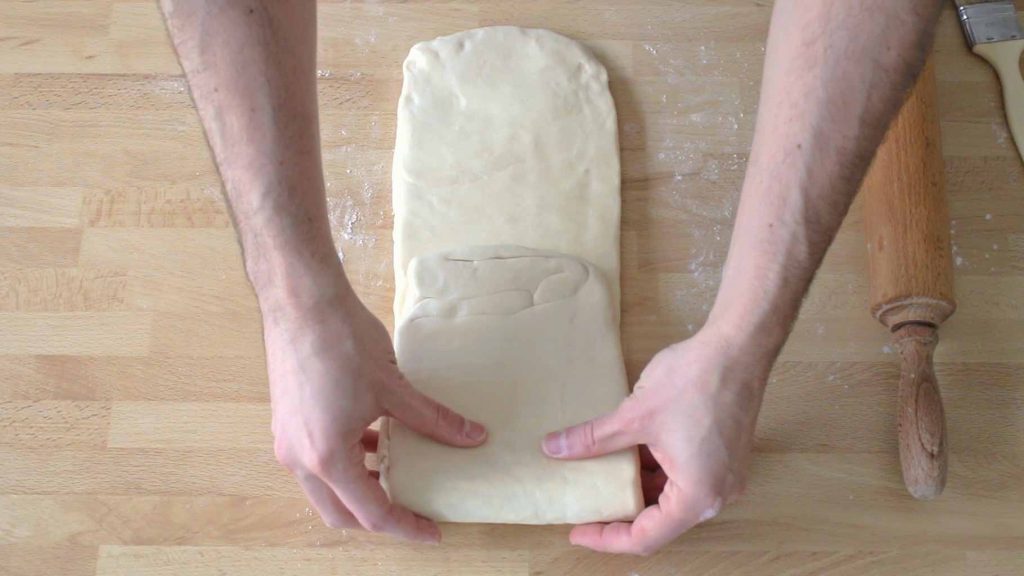
Fold the top third up until it reaches the two thirds of the length of the dough. Brush off the excess flour to prevent the dough from having grey strokes.
20
Finally fold the bottom part up to close the dough. Wrap in plastic and refrigerate for at least one hour.
21
Turn the dough 90° clockwise compared to the position shown in the previous step (so that the open edge is again on your right).
Shaping
22
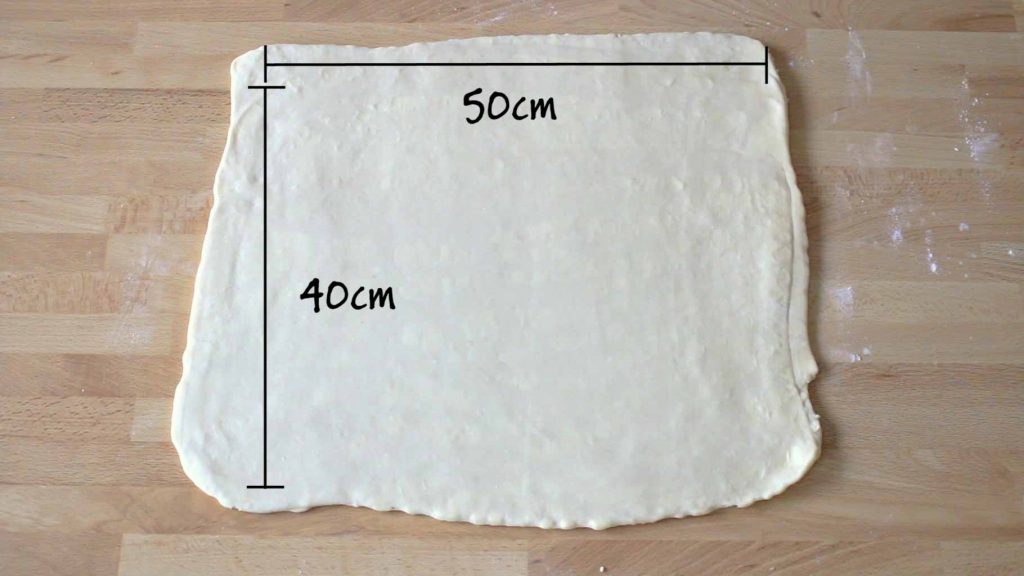
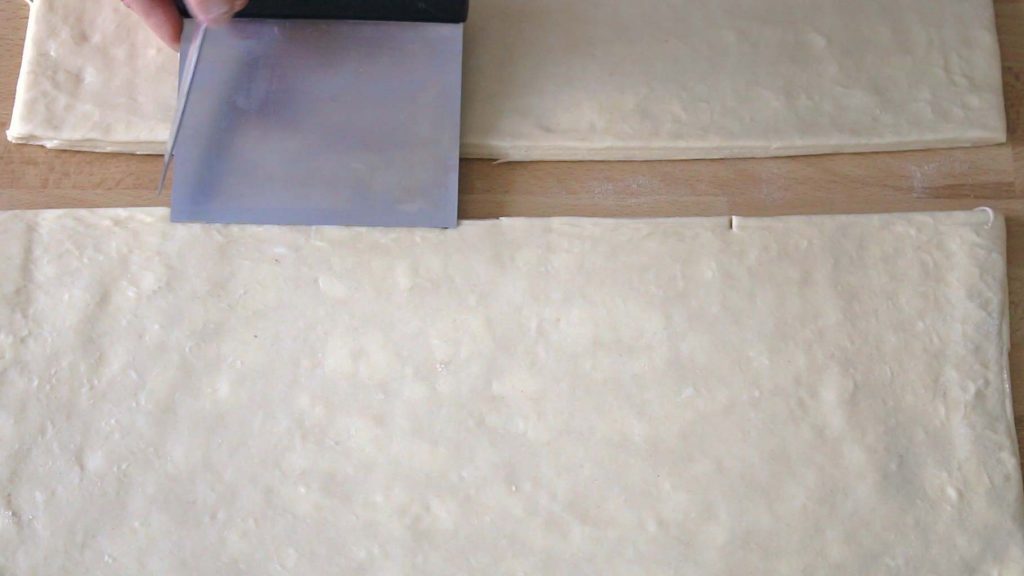
On a lightly floured work surface, roll out the croissant dough horizontally and vertically in order to get a 4mm high rectangle, around 50cm wide and 40cm high
23
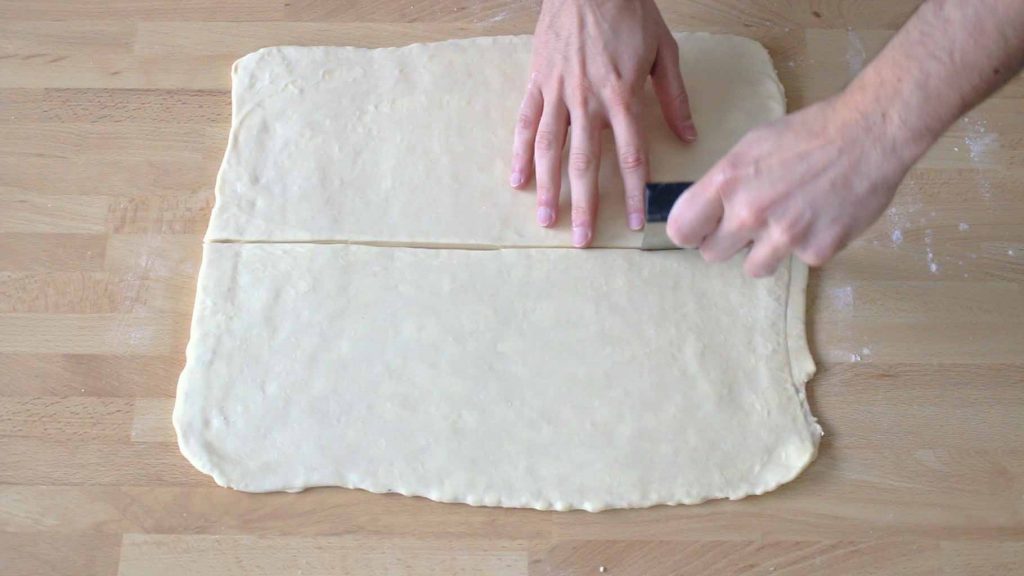
Cut two horizontal stripes, around 20cm high and trim the borders if needed
24
Measure the base of triangles to cut using a dough cutter (~11-12cm)
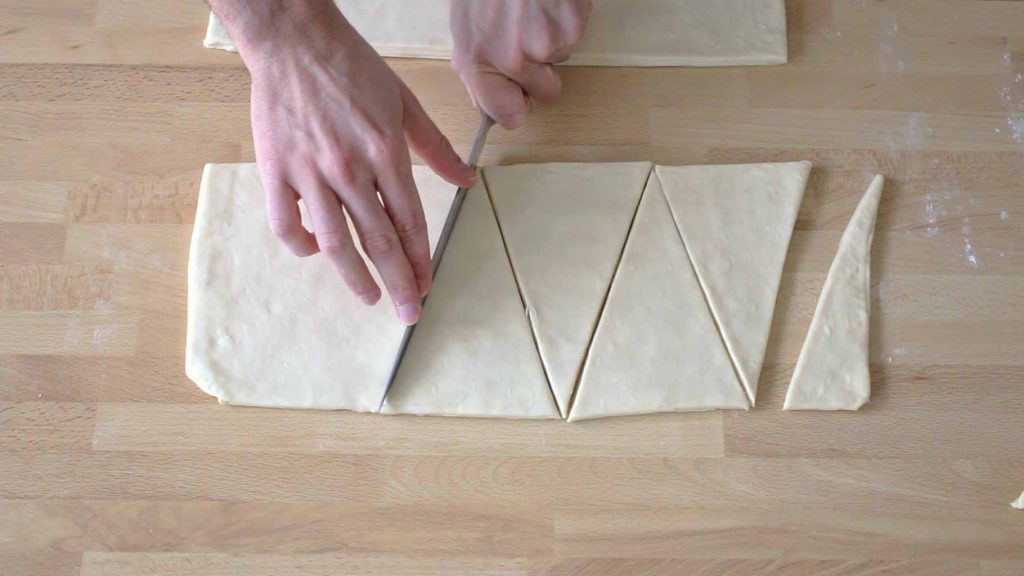
25
Cut triangles using a long knife or a pizza wheel (the tip of the triangle should be in line with the midpoint of the base). You should ideally get 5+5 triangles per stripe.
26
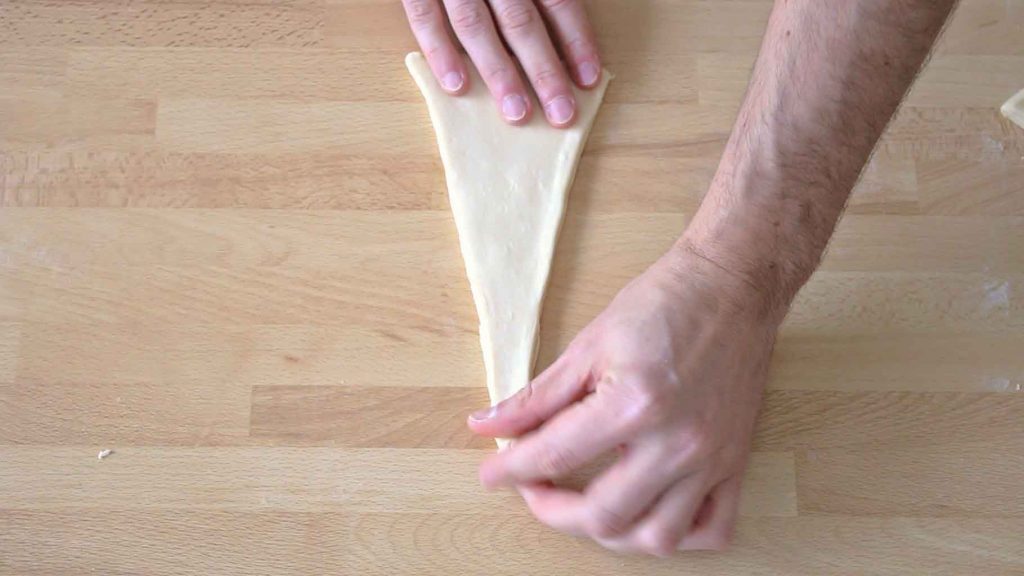
When ready, crush the tip on the work surface (so that it sticks) then "pull" the base of the triangle gently towards you so that it becomes slightly longer
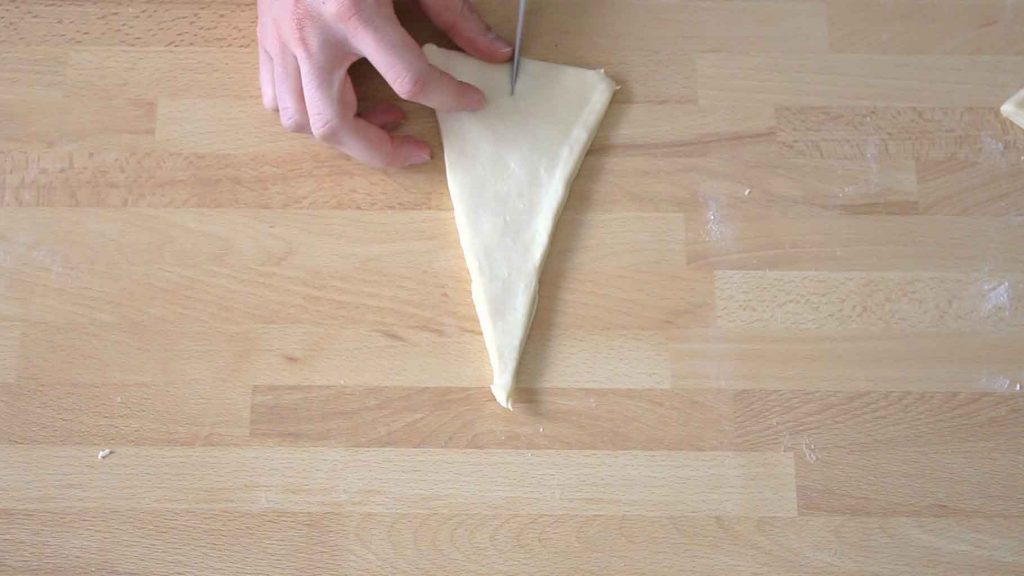
27
Using a dough cutter or a knife, perform a 2cm cut in the midpoint of the base of the triangle and slightly pull the two base corners apart
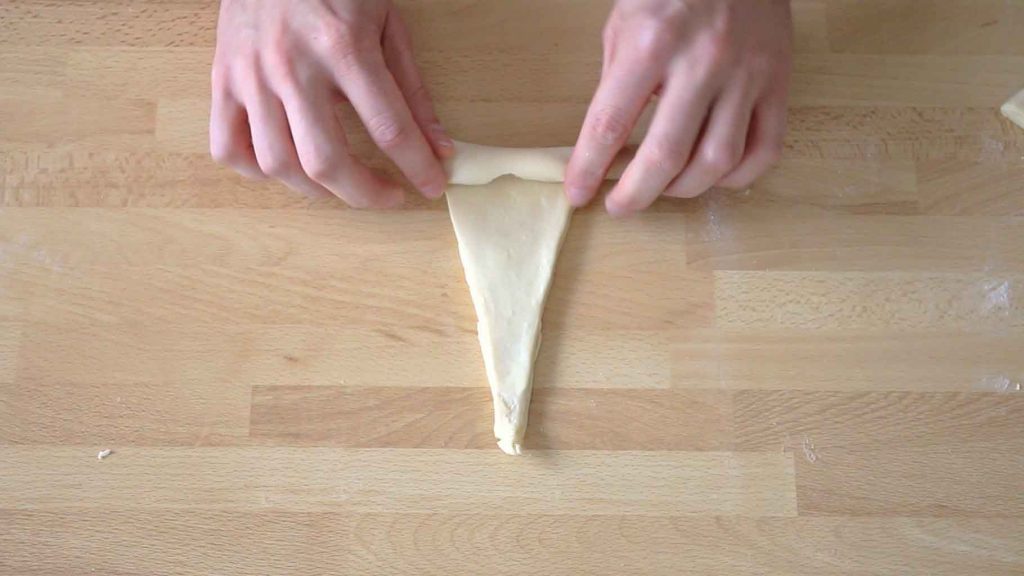
28
Start rolling the croissant from the base using both your hands: first fold the base gently...
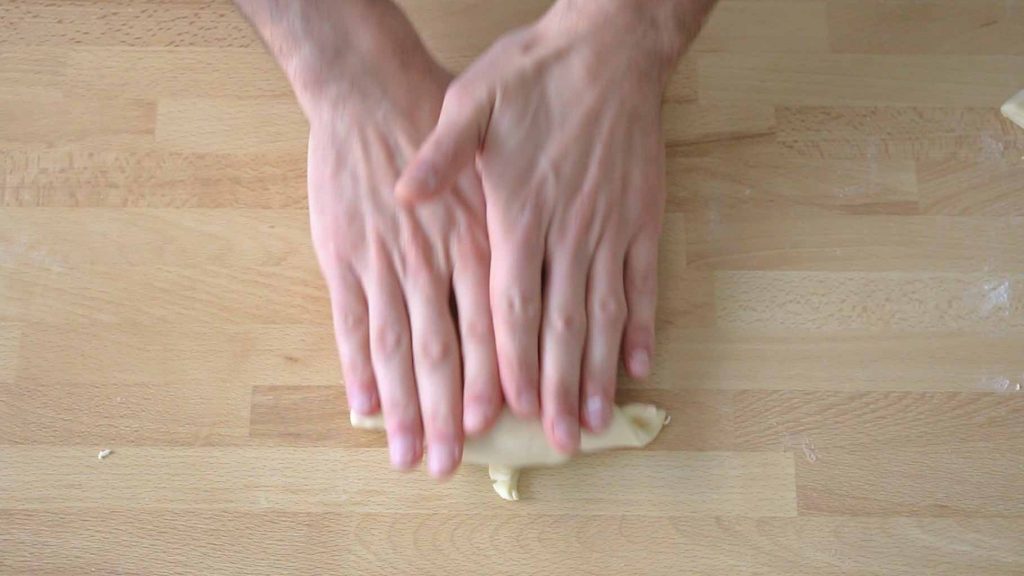
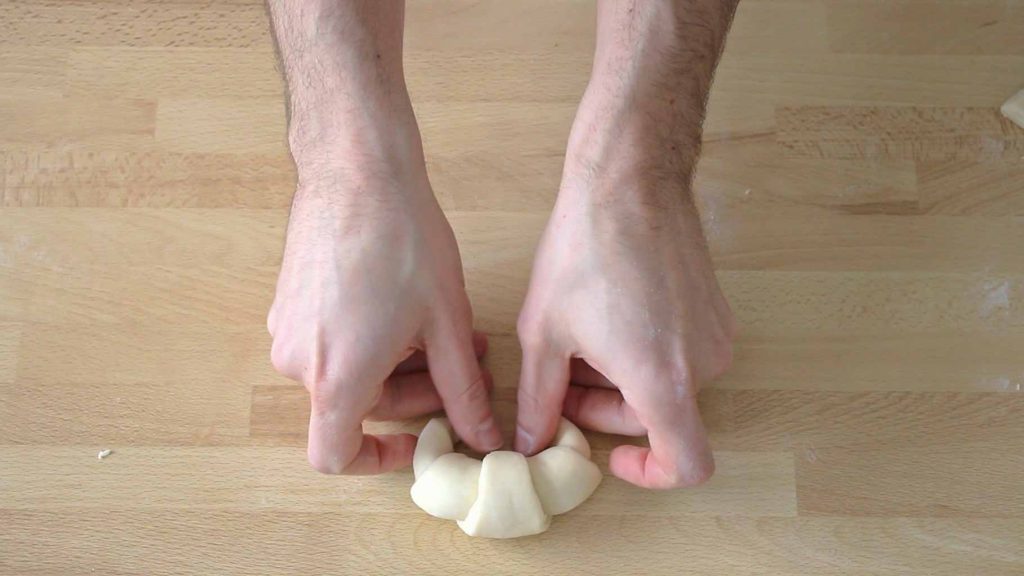
29
...then move your fingers towards the tip to roll completely a croissant (both hands should move together and the external fingers should gently press so that the "horns" of the croissants are not too big).
30
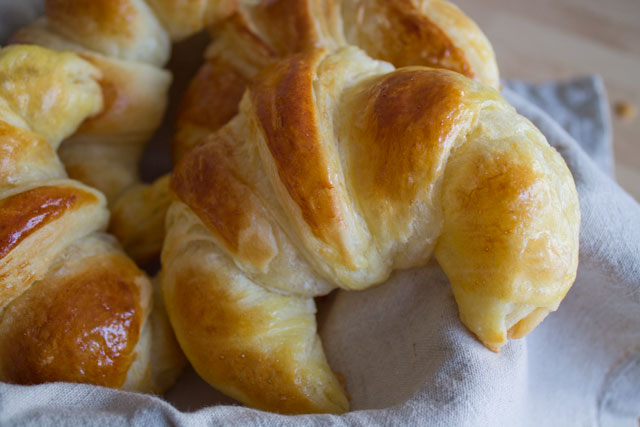
If you prefer, you can give the croissant the standard "horned" shape, (keep in mind they will keep on rising before baking)
Proofing
31
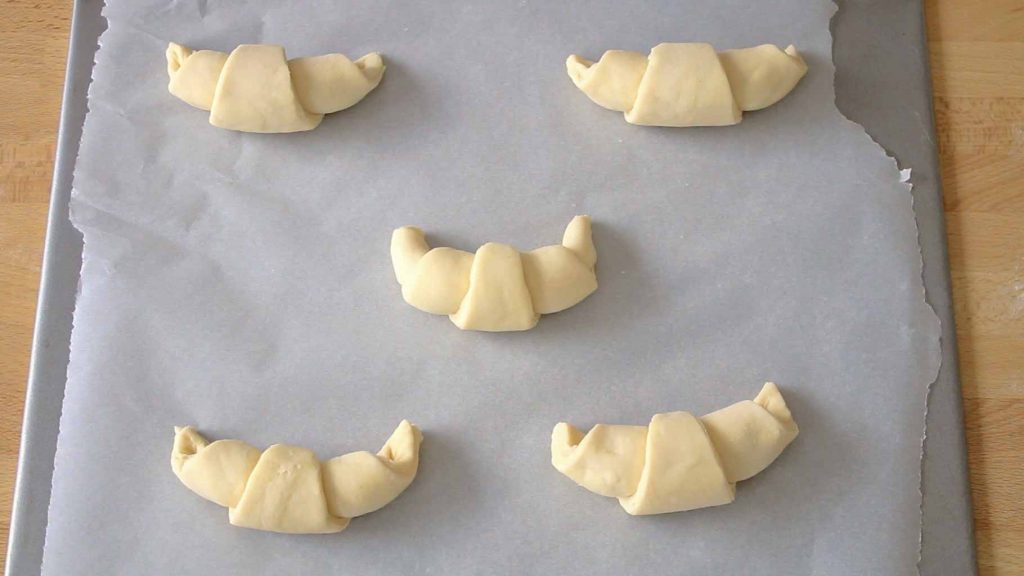
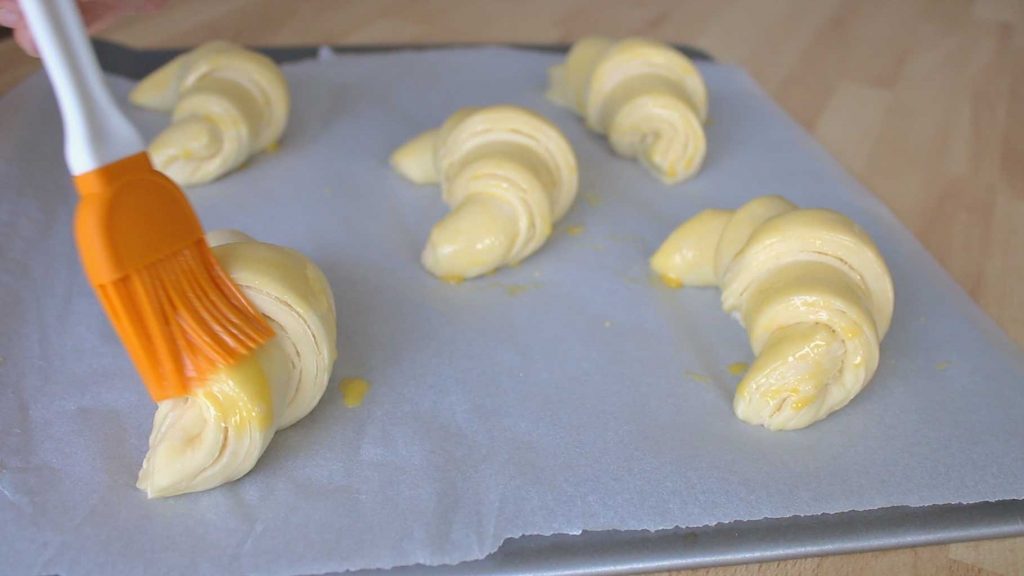
Place the croissants with the seal facing down on a parchment-lined pan (keep them well separated) and brush with the beaten egg and egg yolk
32
Let the shaped croissants proof at room temperature for around 2 hours. Brush again with the egg wash then bake immediately in a preheated oven at 180°C for around 13-15 minutes. Cool down completely before serving.